Are you an underwater photographer looking to capture the mesmerizing beauty of fluorescent coral? Then look no further! Capturing fluorescent corals can be tricky due to their unique light spectrum and other factors. In this blog post, we’ll share some valuable tips that will help you easily shoot these fascinating subjects. From choosing the right underwater camera accessories and settings to timing your shooting sessions around the tides, find out all you need to know about underwater photography for fluorescent coral. Dive in and start creating stunning images today!
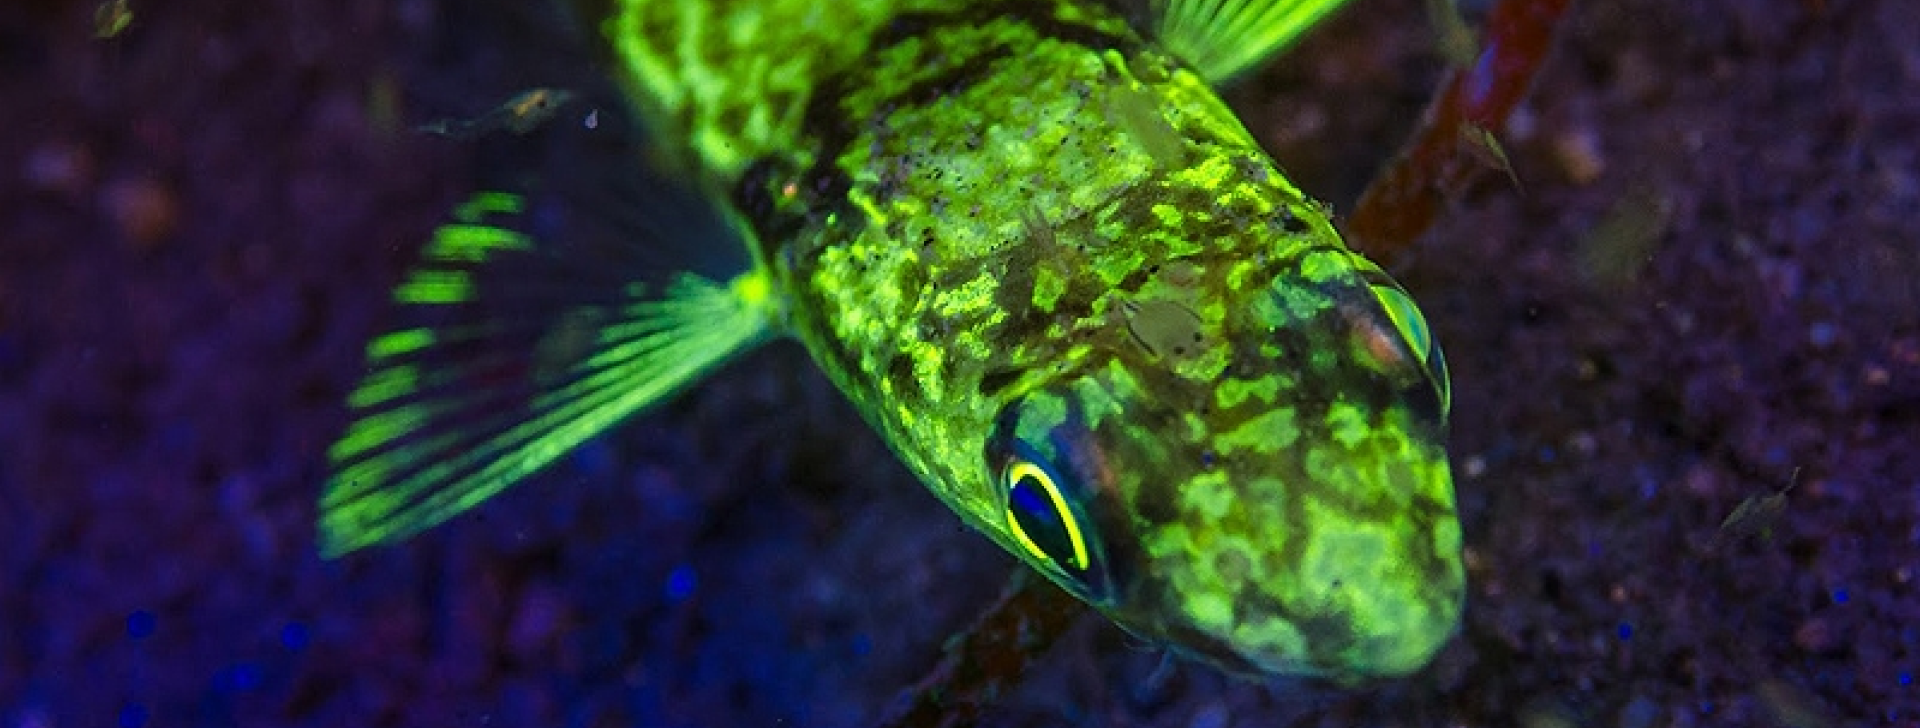
Underwater fluorescence is a natural phenomenon when certain creatures emit a colorful glow when exposed to blue light. This illuminating effect is mesmerizing and can bring a new dimension to your diving experience.
The formation process of fluorescent marine creatures involves absorbing light energy, which is then stored and released as fluorescence. The type and intensity of light that the target absorbs determines the color and brightness of the fluorescence. The process is much more complicated than this simple description because what we are actually talking about is quantum mechanics. THAT subject, however, transcends the point of this article.
In addition to their visual appeal, fluorescent coral and marine creatures are used in various scientific fields for analysis and identification, as well as studies of climate change, ocean acidification, and populations.
Fluorescence photography captures images using blue excitation light, allowing subjects to emit light in different colors. To start fluorescence photography, there are several items that you need to have.
Firstly, you need a camera capable of shooting in manual mode, allowing you to adjust the exposure and aperture values. Having a camera with interchangeable lenses is also advantageous, enabling you to use different lenses in various scenarios. Most of the time, macro photography lenses are what most people use for fluorescence photography. It allows for focusing on a small area closer to the subject, producing clear and detailed images. Of course, your camera will require underwater housing.
Secondly, you need a light source that emits blue light. A blue lamp or flashlight is the most common light source used in fluorescence underwater photography. A mask barrier filter is required to BLOCK the blue light from reaching your eyes. Additionally, your camera lens/housing port will need a barrier filter as well. Without these filters, your vision and images will be completely overwhelmed by the blue excitation light.
Having the proper gear is crucial to creating high-quality images in fluorescence photography. With a camera that can shoot in manual mode, a blue light source, underwater camera filters, mask filter, you are ready to start capturing stunning fluorescence photographs.
Underwater photography at night is an exciting and challenging experience, and the fluorescent coral reefs provide a unique subject to capture. Diving in the dark requires advanced diving skills, proper equipment, and a thorough understanding of the environment. As the light conditions are low, the shutter speed has to be slow, increasing the chances of blurry photographs. Additionally, the white balance settings should be adjusted to avoid color distortion. It is also crucial to avoid disturbing the nocturnal creatures in the reef and maintain safe diving practices throughout the expedition. Buoyancy control and situational awareness are CRUCIAL to performing this type of diving safely.
Clearly, you can’t capture fluorescence in 15 ft/5 m of water on top of the reef on a sunny day. The creatures will indeed fluoresce, but the ambient light will completely overwhelm the effect. Work in the shadows, on the back side of a wall with the sun in front of you. Under a ledge, under a coral head, a cloudy day, a bit of depth. Work in the shadows.
Choosing the right lighting is the key to achieving beautiful and vibrant underwater photographs of fluorescent coral. Using blue lights or blue-filtered strobes is required to cause the fluorescent colors of the coral, resulting in spectacular photographs. Positioning the lights is also important to avoid shadows and enhance the textures of the coral. In some cases, external light sources might be necessary to illuminate the area more effectively. Researching and experimenting with different lighting techniques can result in breathtaking underwater imagery. One useful technique is to use a blue-filtered strobe and a blue video light on each side of your rig to get plenty of light and eliminate shadows. This configuration also gives the flexibility to shoot stills and videos.
One of the most important aspects of underwater photography is to respect the marine environment. Coral reefs are delicate ecosystems easily damaged by unintentional kicks or movement. Therefore, watching where you kick your fins and maintaining proper buoyancy throughout the dive is crucial. Touching or disturbing the coral can also harm the fragile creatures that inhabit the reef. As photographers, we are responsible for capturing the ocean’s beauty while preserving it for future generations to enjoy.
In underwater photography, shooting fluorescent corals at night requires extra attention to your surroundings. It’s essential to familiarize yourself with the underwater environment before capturing images and resisting the urge to touch or disrupt the reef. In addition, be mindful of the behavior of marine life in the area and whether it could threaten your safety. Using a flashlight to illuminate the area and navigate while taking photos is also crucial. By taking these precautionary measures, you can minimize the risk of harm to yourself and the reef ecosystem.
Like any photography, the equipment you use is crucial to the success of your images. When shooting fluorescent corals underwater, your gear is exposed to the corrosive effects of saltwater, so regular maintenance is necessary to avoid equipment failure. Investing in quality gear designed for underwater use, such as housing for your camera and lenses, is essential. It’s also recommended to carry spare batteries, memory cards, and lens-cleaning equipment to keep your camera and gear functioning optimally. By staying on top of your gear and maintenance, you can ensure that your underwater photography experience is fruitful and safe.
In underwater photography, adjusting your camera’s exposure settings is important to capturing stunning fluorescent colors. Start by setting your camera to manual mode and selecting an ISO as low as possible to minimize noise. Adjust your shutter speed to control the light entering the camera. A slower shutter speed allows more light to enter, resulting in a brighter, more vibrant image. However, it’s important to maintain a steady hand or use a tripod to avoid blur. Finally, adjust your aperture to control the depth of field. We recommend the following settings as a starting point. You will need to adjust them to meet your particular camera/lights/strobes/environment….etc. But these will get you in the ballpark.
If you are using the proper torch and filters, you won’t need to worry about color saturation. Your images will explode with color.
Post-processing can take your fluorescent underwater photos to the next level. After transferring your photos to your computer, use a photo-editing tool to adjust the color balance and saturation levels. Fluorescent subjects can often appear overly green or blue, so adjusting the white balance to a slightly warmer tone is recommended. Increasing the contrast can also help to bring out the neon colors. Some photo-editing software may also offer specific color correction tools for underwater photography. With some post-processing, you can bring out the natural beauty of fluorescent coral and other underwater wonders. You should concentrate on getting the right shot so you don’t need to enhance anything.
Learning how to take beautiful underwater photography of coral is a challenge that requires some effort, time, and dedication. With these tips in mind, any photographer can take breathtaking pictures of the fluorescent coral they find while traveling or during an excursion. It may take some experimentation and practice, but those who invest their time and energy will be rewarded with amazing photographs. Even if your shots don’t come out as well as you hope on the first try, keep practicing and tweaking your settings; you never know when you’ll find a picture that speaks to the vivid beauty of underwater life. So grab your camera and dive in for a truly unique experience with nature!
If you have any questions, comments or suggestions – PLEASE don’t hesitate to contact us.

